Tuesday, January 24, 2012

Indian Food!

Saturday I picked up my half lamb order from Back Forty Acres. I had decided a couple of days earlier that I wanted to use some of it for an Indian lamb dish. I had never made anything more complicated than saag in my kitchen (as far as Indian food is concerned). After some Internet sleuthing, a quick inventory of my existing ingredients, and a trip to the grocery store, I was ready to cook. I had the Engineer to assist me, which saved a great deal of tedious chopping time. The Engineer is very meticulous about his chopping, and when I say "cut this onion into 5mm cubes," I know I will get a prep bowl full of perfect 5mm medium diced onion.

I decided to use the meat from the lamb chops I received instead of cutting up my only shoulder roast. The chops were on the small side and I didn't know what else I could use them for. I went to work with my boning knife and eventually I had a bowl with about 1.5 lbs of lamb meat in it.

Fast forward an hour and my Dutch oven was bubbling with fragrant lamb, there were red lentils in another pot, and a large bowl of chopped spinach standing by for saag. My kitchen was redolent with curry, cumin, and coriander. I couldn't wait to eat!

The lamb dish (rogan josh) was AMAZING. It was the clear standout of the meal. The red lentils (dal) could have been spicier and needed more time in the pot to thicken. I will have to tweak the recipe in the future. The saag was not as good as the saag I have made in the past; it was too watery. Fortunately, I made some basmati rice to serve as an absorbent substrate, so it was all good. Oh, was it ever good!

My house still smells like curry.

Yum.

Rogan Josh (Indian Lamb Stew)

1/4 cup canola oil
2 lbs boneless lamb shoulder, cut into 1-inch pieces
Kosher salt
2 onions, thinly sliced (3 cups)
2 Tbsp minced fresh ginger
2 garlic cloves, minced
1 Tbsp + 1 tsp hot Madras curry powder
1 tsp turmeric
1/2 tsp cayenne pepper
2 bay leaves
14 oz tomato puree (I pureed a can of diced tomatoes)
1 cup plain yogurt
2 cups water
1 tsp garam masala
Chopped cilantro leaves

In a large soup pot or Dutch oven, heat the oil. Season the lamb with salt and cook over high heat, stirring occasionally, until the lamb is browned, about 12 minutes. Transfer the meat to a plate to drain.

Add the onion to the pot and cook over medium heat until lightly browned, 4 minutes. Add the ginger, garlic, curry, turmeric, cayenne, and bay leaves and cook for 2 minutes. Add the tomato puree, yogurt, and water. Bring to a boil and season with salt.

Return the lamb to the pot. Cover partially and simmer over low heat until the lamb is tender, 1 hour. Stir in the garam masala and cook for an additional 5 minutes. Serve, garnished with cilantro.

Monday, November 21, 2011

November Spice Rack Challenge: Cinnamon

Mom's Kitchen said: "Surely you've got cinnamon in your spice rack."

Of course I do. It's one of those things---along with thyme and chili powder---that my spice collection never lacks. We think of cinnamon primarily as a baking spice. Not so! It is very versatile.

Let's face it: butternut squash by itself is...lacking. It's not the most exciting vegetable around. I've found creative ways around its blandness, and the one that has captured my taste buds right now is this method of preparation. The "let it sit" method for browning I picked up from Cook's Illustrated, but I never would have thought to add cinnamon to squash were it not for my friend Holly at Rust Belt Runner.

Sauteed Butternut Squash with Cinnamon

Butternut squash
Olive oil (and/or butter)
Salt
Cinnamon

Peel, halve and de-seed the butternut squash, then cut it into chunks. I find that 1-inch chunks are just too "chunky," and fail to yield bite-size pieces, so half-inch chunks are more mouth-friendly (and take less time to cook).

Note: I used the other half of one squash in a stew recipe I made last week, so what was left over was perfect for just me to use in this recipe. Depending on how many people you wish to feed, you may have to adjust accordingly.

Heat oil or butter in a nonstick pan over medium heat. Butter does provide a richness of flavor that is missing with just oil, but it's your call. I lean towards the healthier fats, so I tend to cook exclusively with olive oil, but when I made this tonight I threw a blob of butter in with the olive oil. I was feeling frisky! As for how much...well, I'm a big fan of "liberal drizzling." A tablespoon? Two? Who knows...I pour oil into the pan until it looks like it's enough to sustain whatever it is I'm cooking.

Once the oil is warm, dump the squash into the pan. Shuffle it around a little so the pieces lie down, but then BACK OFF and leave it alone for a good ten minutes. Resist the temptation to stir it. This is important, as the point here is to allow the squash to caramelize. After 10 minutes, flip a couple of pieces. If the underside is browned, go ahead and stir the heck out of the rest of it! Let it sizzle for another five minutes. Sprinkle some salt over it and stir it some more. Sprinkle cinnamon on it, stir it around, and it's done. That's what I had for dinner. Oh, and some white wine. YUM!


Wednesday, August 17, 2011

August Spice Rack Challege: CUMIN!

After dropping the ball on July's Spice Rack Challenge (probably because I was thinking only about my upcoming vacation), I am ALL OVER this one. Why?

I love cumin. I put cumin on everything. Okay, well, not literally everything, but it is one of those spices that disappears more quickly than others from my collection. It seems as if I am always upending an empty jar of cumin over one of my little prep bowls and muttering "better add this to the list..."

My cumin of choice
The problem I face here, however, is what recipe to post when I use cumin all the time. I sprinkled some on the beets I roasted for dinner on Monday. I dusted my stir-fry with it last week. I toss it with grated sweet potatoes, I add it to my saag, I pat it onto chicken trussed up and ready for the oven.

I went with chili, my favorite chili, the chili recipe that came with the instruction/recipe booklet from my parents' first-ever Crock Pot, circa 1982. I received that Crock-Pot's successor (Crock-Pot 2) when my parents upgraded to Version 3.0, but I also have a photocopy of the Favorite Chili (that's really what it's called) from the original 1982 booklet. If I'm aiming to feed a crowd, I go for Favorite Chili every time. I make this for work lunch potlucks and drive my co-workers insane with the smells emanating from my cubicle as I keep the pot on low on my desk.

Favorite Chili (for slow cookers)

2 16-oz cans red kidney beans, drained
2 14.5-oz cans diced tomatoes
2 lbs ground chuck, browned and drained
2 medium onions, coarsely chopped
1 green bell pepper, coarsely chopped
2 cloves garlic, minced
3 Tbsp chili powder
2 tsp ground cumin
1 tsp ground black pepper
Salt to taste

Place all ingredients in slow cooker in the order listed. Stir once, Cover and cook on low for 10-12 hours or high for 5-6 hours.

As with many things, this recipe is ripe for editing and improvisation. I have used a pound of dry beans instead of canned beans. I've used both red and green bell peppers, tossed in a few minced jalapenos, splashed broth over it, added chili sauce for some extra moisture...you can't really mess it up. It always ends up smelling amazing and tasting just as good. And it's got cumin.

Thursday, June 2, 2011

June Spice Rack Challenge: Mint

Wow. So much for posting every month in 2011. Slacker, thy name is Sun Runner. But! Yesterday I picked up my first box of the season from Tantre Farm. Oh, glorious green bounty of spinach, kale, lettuce, tatsoi, spicy mix, radishes, green onions, and asparagus!

How fortuitous, then, that one of the herbs available for selection was mint. I love me some mint. I grow mint in my herb garden. Well, upon further reflection, the mint sort of grows itself. What started out as one plant a few years ago has morphed into a multi-stemmed invader. I should have stuck that bad boy into his own pot. Be warned, herb garden growers! Isolate your mint, or it will advance on the rest of your garden like the Visigoths on Rome!

Mint is best utilized in my favorite warm weather beverage. After the past two weeks of dreary rain, today's 70 degrees and sunshine were a welcome sight. Thus, I made myself a gin smash, heavy on the mint. Perfect for this month's Spice Rack Challenge.

But what mint to use??

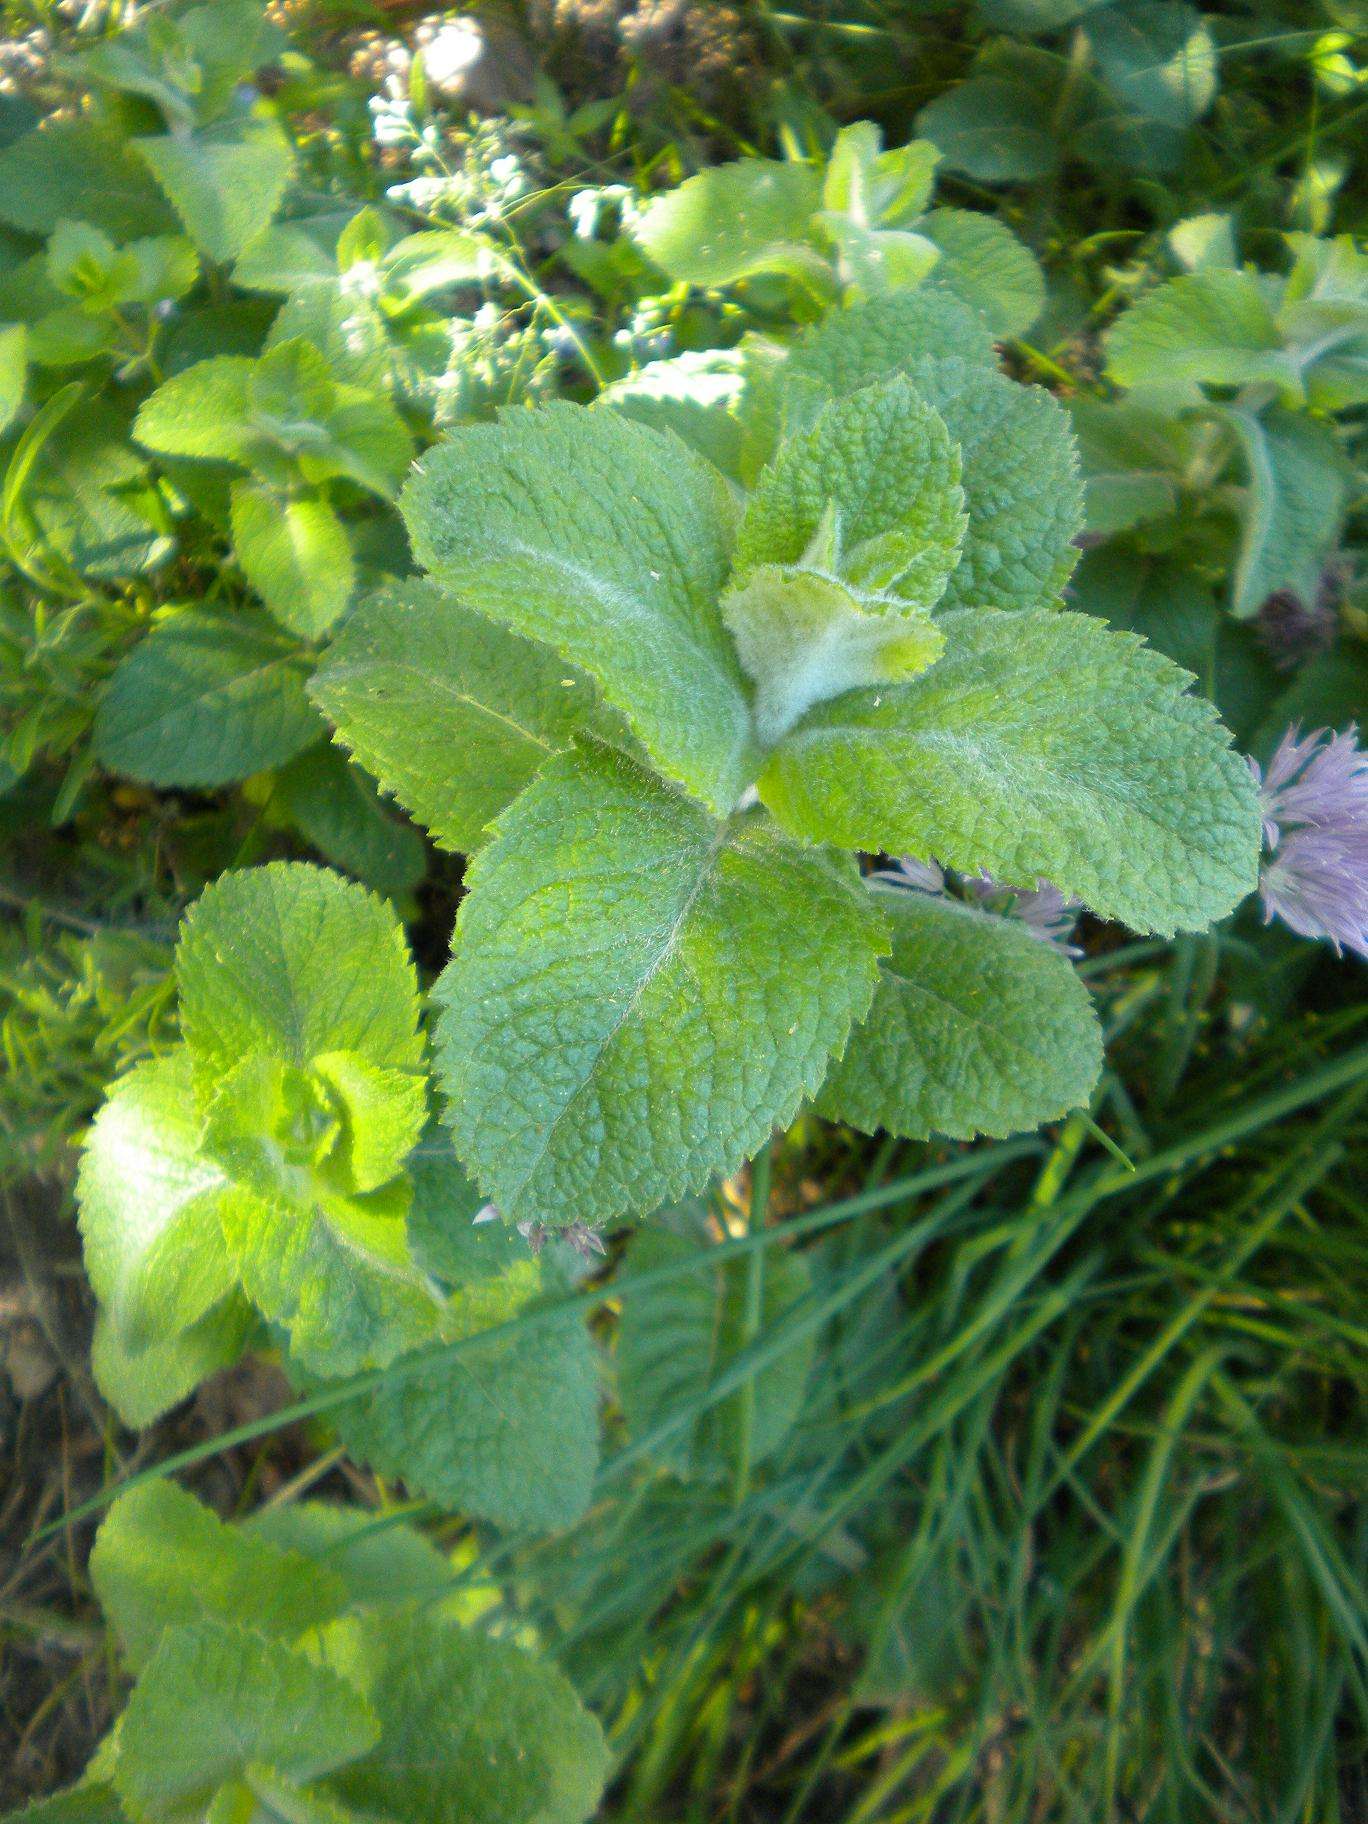
My herb garden mint

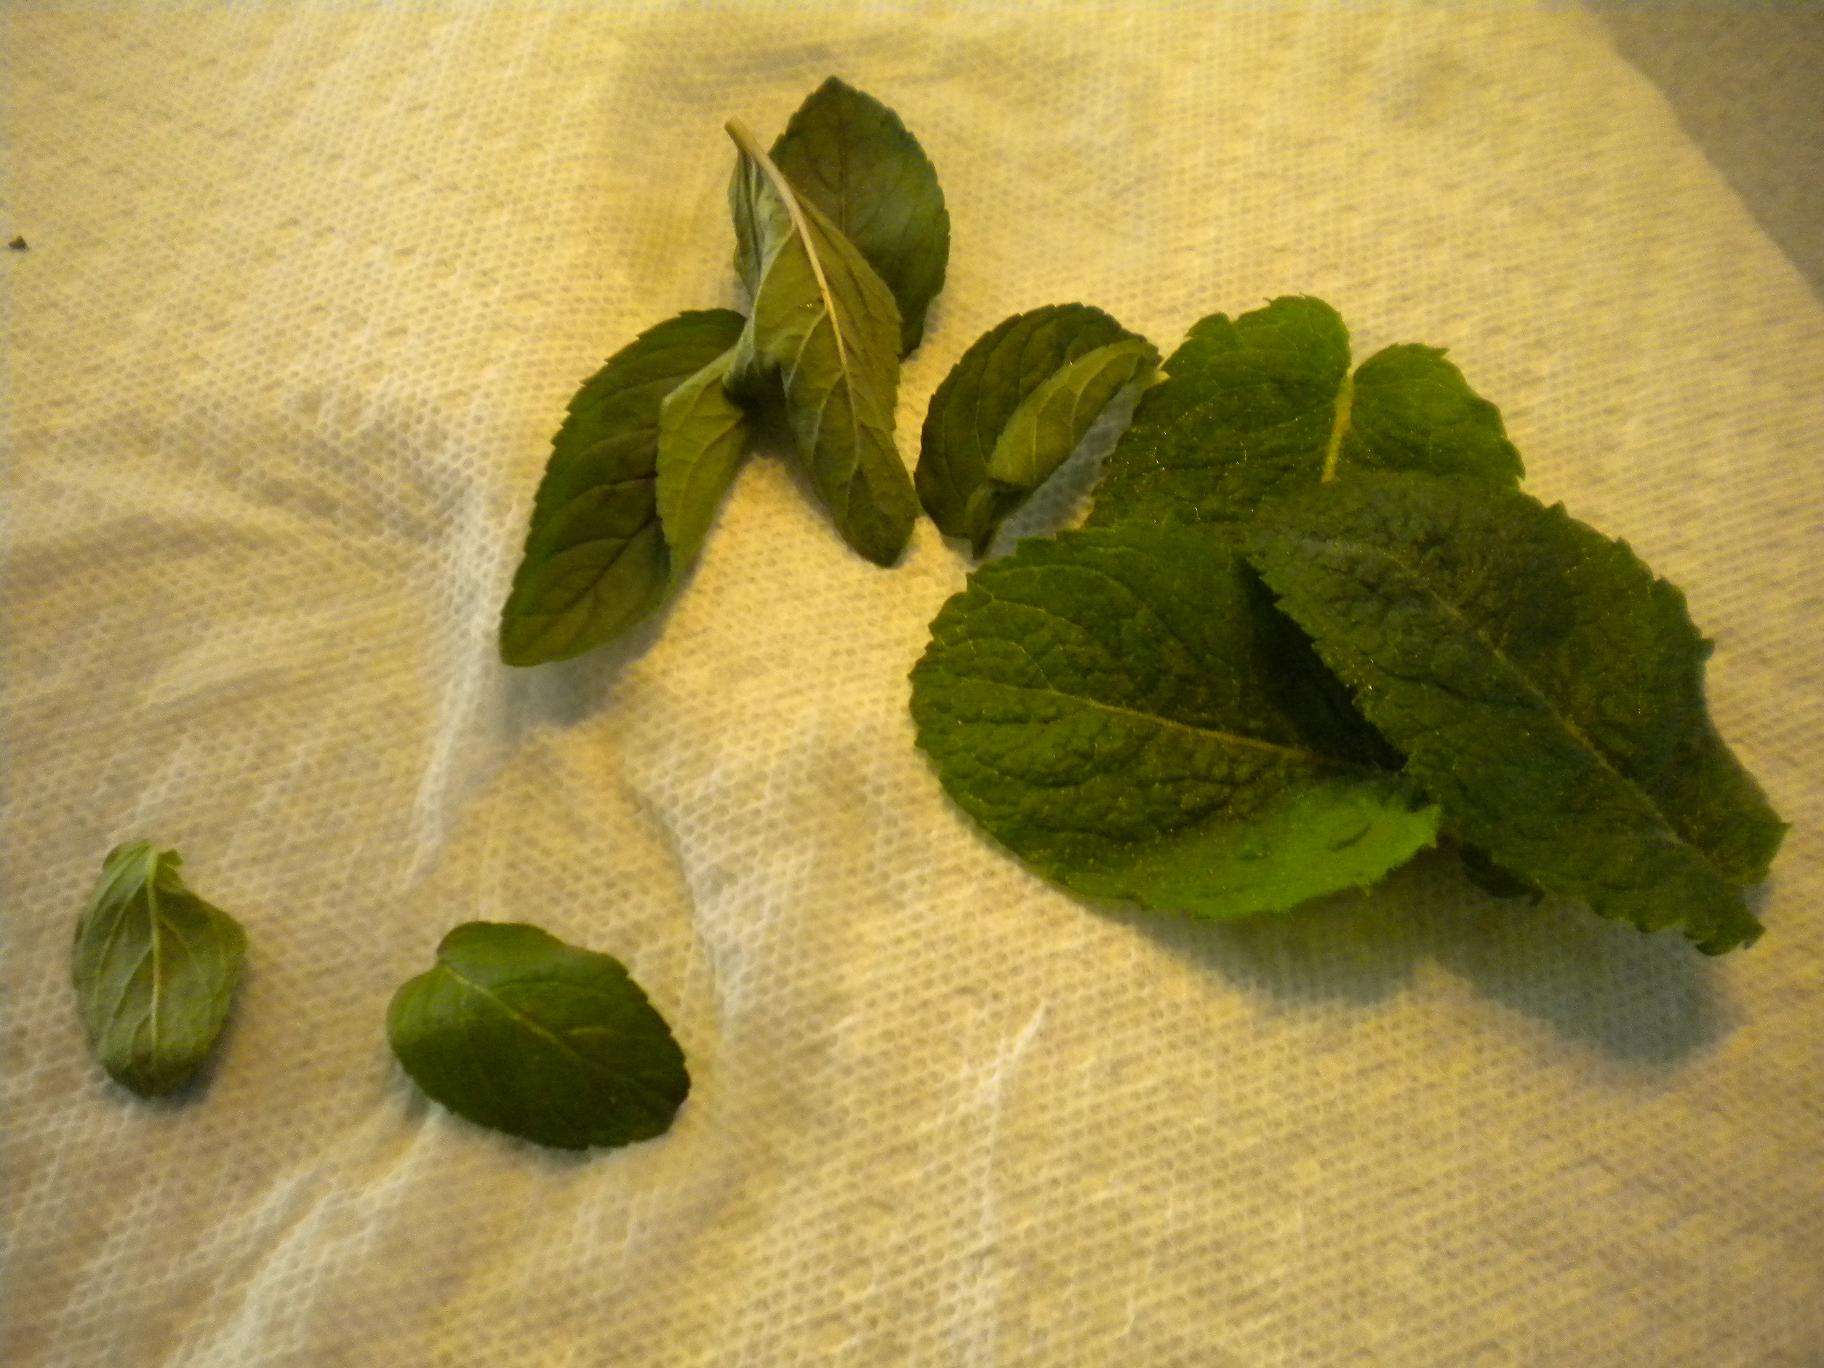
Tantre Farm mint
How about BOTH?

Mint-o-rama!

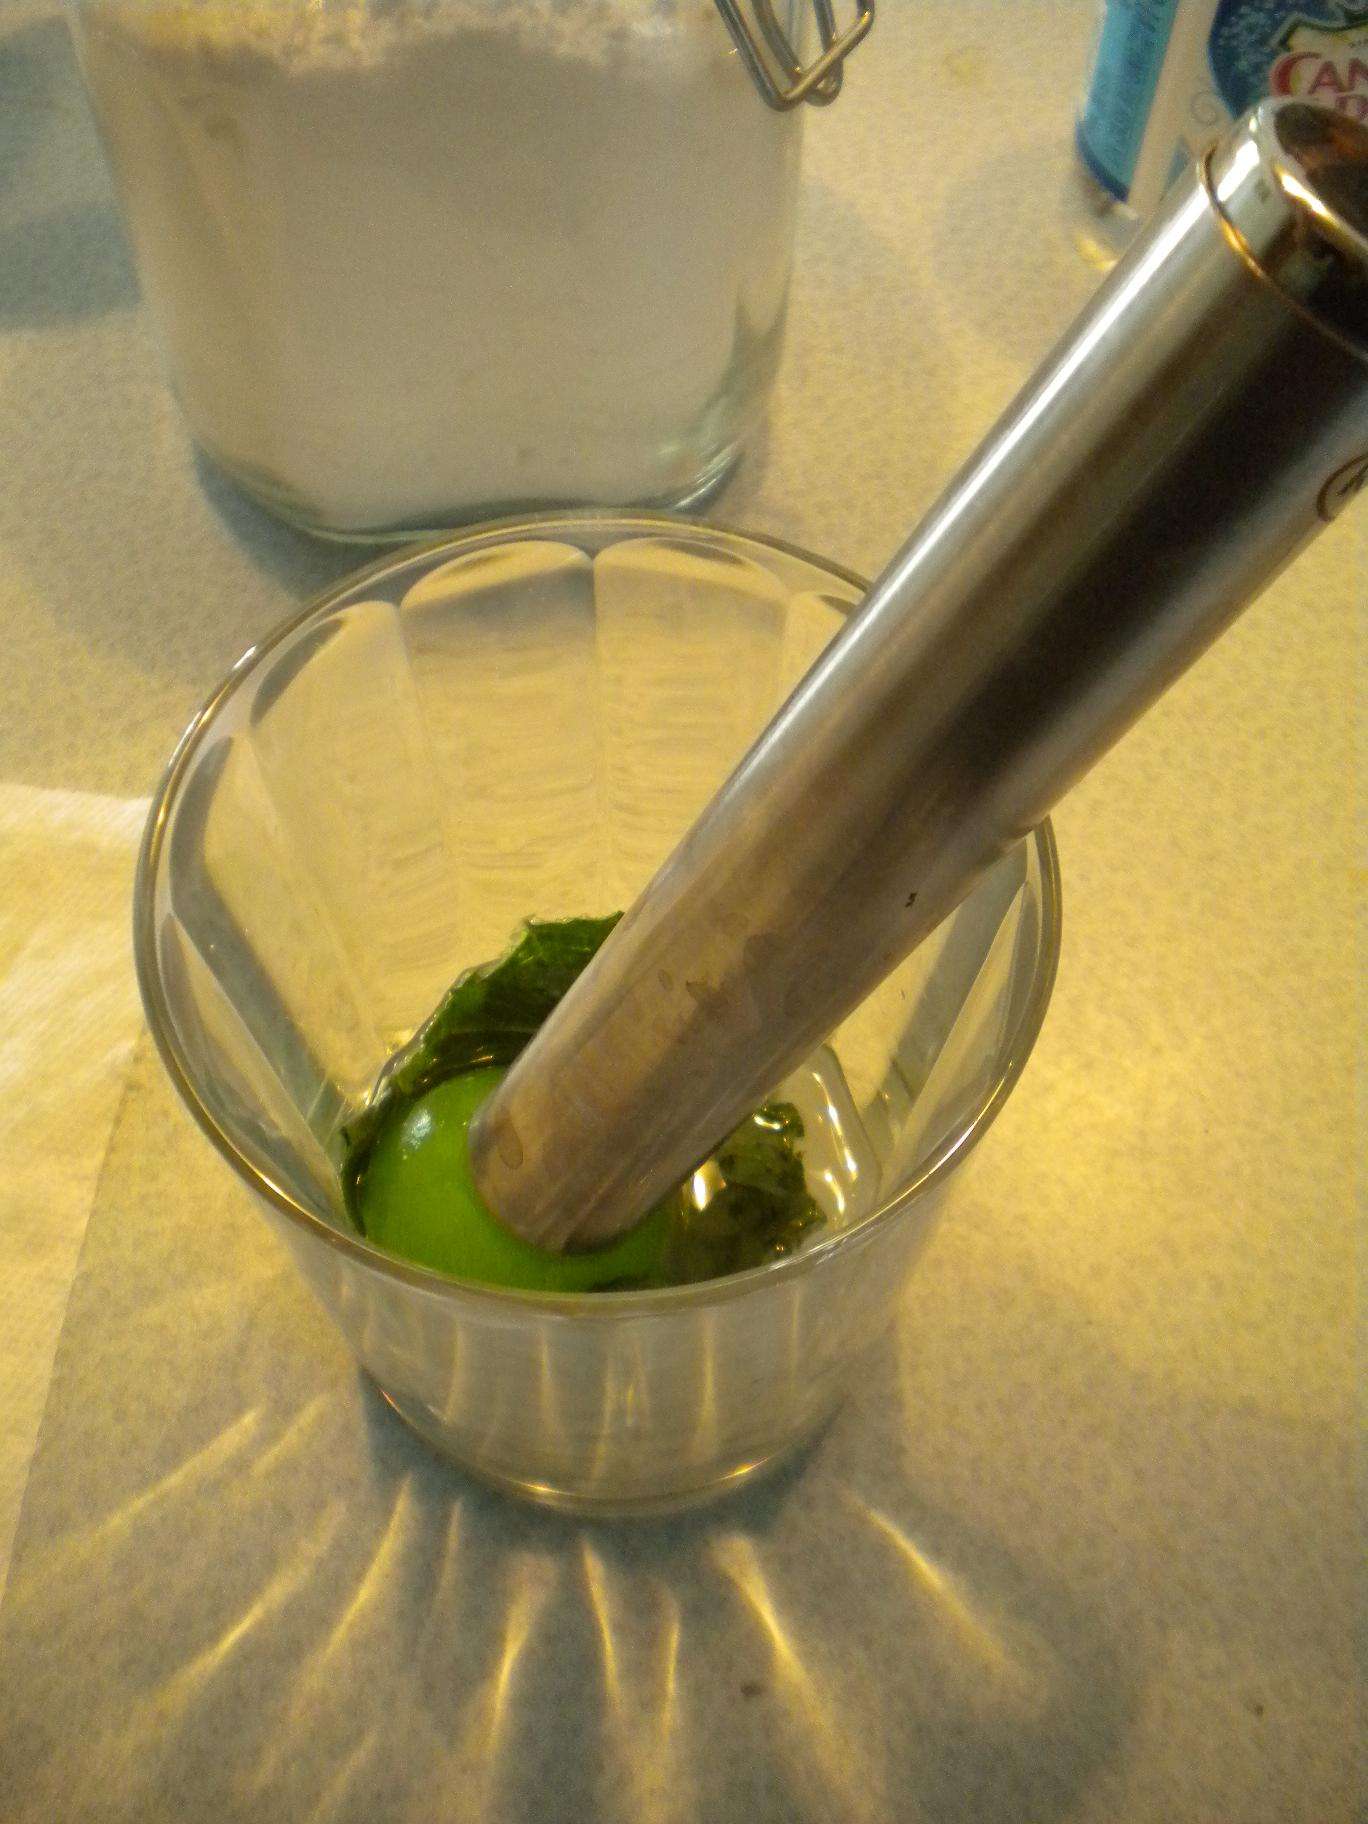
Muddled

Ready to drink!
Ahhhhhh
Ingredients:
  • mint leaves (a few)
  • gin (a lot)
  • club soda (to fill the glass)
  • sugar (a teaspoon or so)
I make mine thusly:

Put mint, sugar, and a splash of club soda in a flat-bottomed glass. Smash the heck out of it with a muddler. If the club soda starts turning green, that's a good sign. Measure out some gin depending on how mellow you'd like to be and add to the glass. Throw in some ice cubes. Top off with club soda. Stir it up. Toss on a mint spring (or add some more gin) if you're feeling feisty. Retire to porch, relax in sun with cold beverage and reading material.

Monday, January 24, 2011

Vegetable Chowder

Yesterday I met up with some of the Michigan Lady Food Bloggers for a soup swap. I brought my tub of chowder and went home with five large containers of soup, which will feed me for days. My offering was a vegetable chowder.
  • 4 tsp canola oil
  • 1/2 cup green bell pepper, diced
  • 1/2 cup red bell pepper, diced
  • 1/2 cup shallots, minced
  • 1 tsp curry powder
  • 3 cups corn kernels
  • 3/4 lb red-skinned potatoes, cut into 1/4-inch cubes
  • 1 cup vegetable broth
  • 1/2 tsp salt
  • Freshly ground black pepper
  • 3 cups milk (skim if you're fat-content-conscious, 2% if you want a rich flavor)
Heat the oil in a large soup pot or Dutch oven over medium heat. Add the bell peppers and shallots; cook, stirring occasionally, until tender, about 5 minutes. Add the curry powder and cook, stirring occasionally, until fragrant, 30 seconds.

Stir in the corn, potatoes, broth, salt, and pepper; bring to a boil. Reduce the heat and simmer, covered, until the vegetables are tender, 10 minutes.

Transfer 1/2 cup of the vegetable mixture to a blender; add the milk and puree until nearly smooth. Return to the pot and cook over medium heat, stirring, until just heated through. Makes four 1 1/2-cup servings.

(adapted from Weight Watchers Ultimate Flex & Core,  "Fresh Corn Chowder," p. 52)

As always, I made some modifications...since I was making this for a larger number of people than specified, I used more corn, more peppers, more potatoes, more broth, and more milk. I also sprinkled a healthy portion of cayenne pepper into it, giving it a spicy kick which elicited a number of comments.

This recipe is my favorite way to use up large amounts of fresh corn scraped from the cob during the summer. When my farm share yields 6 big ears of corn, instead of eating them one at a time, I make this chowder. I also like to use red peppers and potatoes from my farm share.

It was lovely to see the ladies of the MLFB again...I think my last event was the holiday cookie exchange in December 2009!

Tuesday, January 18, 2011

January Spice Rack Challenge: Rosemary

My, my, my it has been a while since I posted here, hasn't it? I find the lack of attention paid to this blog rather shameful, considering how much I cook. Fortunately, I have an excuse to resuscitate my food blog: a monthly cooking challenge put together by my fellow Michigan Lady Food Blogger Mother's Kitchen: the Spice Rack Challenge. The focus for January was on rosemary.


Rosemary. It grew wild and untended in my childhood home of northern California. There was a particularly lush, fragrant patch in a grassy area on my walking route home from my elementary school. I forgot about the rich piney smell of rosemary bushes warmed by the sun until I went back to California for vacation in 2009. I discovered rosemary being used as landscaping near the house in which I was staying.

It's...a shrubbery! Of rosemary!

It smelled fantastic!

I hosted a large gathering at my house at the beginning of the month which necessitated the cooking of several different crowd-pleasing dishes. Along with the black bean chili and the beef chili and baked ham I made this lamb stew, one of my cold-weather favorites.

Savory Lamb Stew (adapted from Weight Watchers New Complete Cookbook, 2006, p. 203)

Ingredients:
  • 4 tsp olive oil
  • 1 onion, diced
  • 1 carrot, diced
  • 1 celery stalk, diced
  • 2 garlic cloves, minced
  • 1 lb boneless lamb leg meat, trimmed and cut into 1 1/2-inch cubes
  • 1/2 cup dry white wine
  • 1 14.5-oz can diced tomatoes
  • 2 tsp fresh rosemary, minced
  • 2 tsp fresh sage, minced
  • 2 tsp fresh thyme, minced
  • 1/2 tsp grated lemon zest
  • 1/2 tsp salt
  • Freshly ground pepper
  • 1 cup water
  • 2 medium red-skinned potatoes, cubed
  • 2 cups cut green beans
  • 1 tbsp fresh parsley, minced
In a large soup pot or Dutch oven, heat the olive oil. Saute the onion, carrot, celery, and garlic until the onion is translucent, 8-10 minutes. Add the lamb and saute until no longer pink, about 4 minutes. Add the wine and cook for 2 minutes. Add the tomatoes, rosemary, sage, thyme, lemon zest, salt, pepper, and 1/2 cup of the hot water, stir, and bring to a boil. Lower the heat and simmer gently for 40 minutes, stirring occasionally. Add the potatoes, green beans, and the remaining 1/2 cup of water, cover, and simmer until potatoes are tender and the liquid has reduced, about 20 minutes. Serve sprinkled with the parsley.

I quadrupled this recipe for my party because I was expecting about 20 people at my house. This meant I used almost all of the little container of fresh rosemary I had purchased. It was a huge success and I had several people tell me it was absolutely delicious. You'd never guess it was a Weight Watchers recipe!

I hope the coming months of the Spice Rack Challenge will motivate me to resume regular posting. I have a food blog for a reason: I love to cook and I love to eat, and at one time I wanted to share that with whoever was interested. I can't wait to see what next month's challenge is!

Monday, April 26, 2010

Limoncello

A while back my friends in Sacramento, California, sent me a box full of lemons from their lemon tree. After some pondering I decided to use some of them to make homemade limoncello.


They smelled so good, you just can't even imagine. It was a burst of summer in the middle of a Michigan winter.

I did a simple Google search for "limoncello" and after some perusal settled on this recipe, from the Washington Post. I had a source from Indiana procure for me a bottle of true high-octane Everclear, 190 proof, which is unavailable in Michigan. This, according to various persons in the know, is what one should use to make homemade limoncello.

I used one of my growlers for the initial steeping. It worked perfectly! And yes, I did manage to get all of the lemon peel out of the jug once steeping was over. There was a lot of shaking involved.

The sugar water-lemon infusion mixing step. This was messy and sticky. The end result filled two half-gallon growlers. That's a lot of limoncello.

The finished product!

I was as careful as I could be when I peeled the lemons but I think a wee bit of white pith made it into the infusion and made it a tiny bit more bitter than it should have been. Nevertheless, for my first attempt at anything like this, it turned out remarkably well. It tastes great and is delicious by itself with some ice or mixed in with other things.

This is not a concoction for the impatient. It took five weeks from start to finish, and I have another half gallon that's still resting in my basement. Anyone want some homemade limoncello?

Monday, March 1, 2010

Chocolate Chambord Ice Cream


A random comment on Facebook did what nothing else could: prod me into updating my poor, sad, neglected food blog. I don't even know how I can be called a Michigan Lady Food Blogger since I haven't updated my food blog in five months! I've had the pictures for this sitting around since LAST SUMMER. There's no excuse. I'm just lazy as heck.

When I discovered how easy it is to make your own ice cream, I started experimenting with different flavors. I learned that I could take a plain vanilla cream base and add almost anything to it. In one memorable experiment, my friend and I made ice cream which contained Gummi Bears and mini marshmallows (that strange combination was his request). Why not? It was fun, and I love having fun with cooking. Additionally, I am in complete control of the ingredients, and as such my homemade ice cream has no salt, less sugar, and no weird chemicals with multisyllabic names.

Anything chocolate has long been a favorite ice cream flavor of mine, so I began playing with various kinds of chocolate. Orange-infused chocolate chip: a huge hit. Chocolate with Grand Marnier: not so much; something in the Grand Marnier prevents the ice cream from ever fully freezing so the ice cream is mushy and slippery. Chocolate Chambord, however: a smashing success.

Ingredients:
  • 1 cup whole milk
  • 1/2 cup granulated sugar
  • 8 oz bittersweet or semisweet chocolate, broken into 1/2-inch pieces
  • 2 cups chilled heavy cream
  • 1 tsp vanillla extract
  • Chambord liqueur
Heat the whole milk until it is just bubbling around the edges (this may be done on a stove or in a microwave). In a blender or food processor fitted with the metal blade, pulse to process the sugar with the chocolate until the chocolate is very finely chopped. Add the hot milk and process until well blended and smooth. Transfer to a quart-sized container and let the mixture cool completely. Stir in the heavy cream and vanilla to taste. Chill for 30 minutes or longer. Turn your ice cream maker on and pour the chilled mixture into the freezer bowl. Let mix until thickened, about 25-30 minutes. In the final five minutes of mixing, add 1/4 to 1/2 cup Chambord liqueur (depending on how strongly you wish your ice cream to taste of raspberry). Once mixing is complete, transfer bowl to freezer and cure for at least 2 hours. For the ice cream to freeze solid all the way through may take up to 4 hours, so if you want to have this for dessert, don't start making it at 8:00 pm!

This is the Basic Chocolate Ice Cream recipe from the user manual for my Cuisinart automatic ice cream maker (a truly wonderful machine). I added the Chambord all on my own. I like to use Ghirardelli bittersweet (60% cacao) chocolate chips because not only does it save you the tedious task of chopping chocolate, the chips are delicious to snack on.

A variation on this ice cream which I made another time included fresh raspberries, which I threw in along with the Chambord at the tail end of churning time. Now that was an epic ice cream!

I know it's winter and we're all so very tired of cold, but it's always time for ice cream!

Sunday, September 13, 2009

Oh vegetable stir fry, how do I love thee...

I think I could write a poem about the colorful elegance of my dinner tonight. I "fridge shopped" again, plucking things from the crisper drawers which I thought would blend nicely in my big stainless steel pan. I combined two recipes from my last Tantre share newsletter, because I wanted to use both the daikon radishes and the tatsoi. Add an onion, red bell peppers, garlic, and carrots (all from my share), and I ended up with a beautiful plate of bright red, green, orange, and white. I made a pot of brown rice, nestled the vegetables next to it, and paired this gorgeous yet simple and healthy meal with a chilled Torrontes from Argentina.

I was at the Home Grown Festival in Ann Arbor yesterday afternoon, where I saw many of my Michigan Lady Food Blogger friends. I tasted tomatoes, ate a black bean taco (Arbor Brewing), blueberry and feta pizza (Silvio's Organic Pizza), goat cheese and carmelized onion tart (The Grange), a delicious pastie (Tranche de Vie), a Rice Krispie square (Bizzy Lizzy), several local beers, and the best thing of the whole day: Maitelates dulce de leche cookies. Oh my god people those are TO DIE FOR. I bought a bag of six and I know they will not be my last.

I wanted to eat more, more, MORE!! but after the blueberry pizza I was totally stuffed and as badly as I wanted a tamale I just didn't think my stomach could handle it. Plus the crowds were reaching a point which had triggered my inner alarm and I knew I had to get out of there. I ran 16 miles Saturday morning, an endeavor which burned 2100 calories, and I definitely earned every delicious bite I ate at the festival.

I love living in such a foodie town!!

Friday, August 28, 2009

Sometimes a little chaos is good

I rummaged through my refrigerator and threw together a dinner of no particular provenance or coherence: chopped tomatoes, onions, garlic, a bunch of leafy greens, and shredded roast chicken. The veggies were from my Tantre farm share and the chicken was Back Forty Acres. I sauteed the veggies, splashed some broth over the mess to keep it moist, threw in the chicken, and let it simmer. I had originally intended to toss it with pasta but then I thought, "why not just eat the mixture?" So I did. Just the mixture plopped in a bowl. With a hearty glass of my newly received wine shipped from California, it was...an amazing dinner. Just a big sloppy mƩlange of ingredients and a glass of wine and a cat on my lap. Delicious. Nutritious. Fabulous. No recipe, no direction, no plan, just me and my cutting board and knife and fingers dipping into my jar of salt for a crystalline sprinkle across a fragrant bubbling pan of food, good food, that I made for myself.

I love cooking. I love eating. I love opening my fridge and thinking, "So, what do I feel like tonight?" and pulling something down out of thin air. Yes, I dine alone these days. But I'm never lonely.

Friday, July 10, 2009

Kitchen Sink Pasta

I was going to call it "Instapasta," and then "Garbage Can Pasta," but I think "Kitchen Sink Pasta," as in "Everything But The..." works best. This is what I make when I want a fast, easy meal which uses up ingredients I already have hanging around the fridge and pantry. Whatever is on hand. Tonight's version went like this:
  • Whole wheat mini shells (carbs for my long run tomorrow)
  • Kale (farm share)
  • The onion end of some green onions (farm share)
  • Arugula (farm share)
  • Garlic
  • Shredded chicken (leftover roasted Back Forty Acres chicken)
  • S&P
  • Parm cheese
A quick sautƩ in olive oil of the onion and garlic, throw on the chicken to heat it up, add the greens to wilt, all while the pasta is cooking...drain the pasta, add to the mixture, and toss. Presto! I have carbs, protein, and vegetables in one dish. As summer marches on, squash, peppers, and tomatoes will all get their chance as well.

Wednesday, July 1, 2009

Fabulous Frittatas


Now that the vegetables are flooding in, I have turned once again to one of my staples in order to utilize them: the frittata. I have learned there really is no wrong way to make a frittata, and you can put almost anything into one. For the one in the picture, I used Tantre Farm spinach and scallions from my farm share, added sun-dried tomatoes, and topped it off with grated Parmesan cheese. The eggs came from Back Forty Acres. I cooked up some bacon as well and had myself a little breakfast for dinner. The nice thing about these big-dish frittatas is I can take pieces of it to work for a midmorning snack for several days. Last night I made one with kale, scallions, onion, and cheddar cheese. Ah, the frittata. Making dark leafy greens taste good since...forever!

Monday, June 8, 2009

Salad Days

It's that time of year again. Farm share time.

It was a long dry spell between the closing of the 2008 TantrƩ Farm season and the beginning of this year's influx of vegetables. I picked up my first share on May 26: spinach, scallions, radishes, potatoes, lettuce...oh, the drive down the familiar road was like coming home. I dived into a sea of green and I don't want to come out. Tuesday evenings are produce prep time: washing, spinning, drying, dividing, wrapping, storing. I prep my salad greens for the week, bag my radish leaves, wrap the spinach, caress the strawberries. And then it's dinner time. Scan the fridge, open the crisper drawers, what part of my bounty will I use today?

Tonight I decided it was time to eat the remainder of my leafy greens from last week. Into the salad spinner went the last bunch of spinach, the tatsoi, the spicy greens mix. I sliced some sirloin from my quarter side of beef, chopped a couple of carrots and an onion, minced ginger and garlic, and threw the whole lot together in my stir-fry pan. The huge pile of greens wilted down to almost nothing. I divided the mass in half (one for now, one for lunch!) and devoured it. So good.

Last week I received strawberries in my share box. I used them to make orange blossom-infused fruit salad on two occasions. My god, the scent of that orange water is intoxicating. And the fresh strawberries mixed with blackberries...I almost had a moment, if you know wht I mean.

My farm share pickup day is Tuesday. Tomorrow is another day full of potential.

Oh yes, and, where are my beets? I want my beets. Chocolate beet cake and oven-roasted beets are calling!

Saturday, May 2, 2009

Pâté de Foie de Porc


That's fancy talk for "pork liver pâté," which is what I made for the Michigan Lady Food Bloggers' "April in Paris" gathering on April 26. The theme for this event was French cooking, using Julia Childs' seminal Mastering the Art of French Cooking as inspiration. (Aside: Julia was a fellow Smith College alumna, class of '34. Smithies represent!)

I decided I wanted to use the pork liver from my Back Forty Acres hog for pâté. I honestly didn't know what on earth I was going to do with those pork livers. This presented itself as the perfect opportunity. I awakened the livers from their frozen slumber and got them ready to perform.

When I read the recipe I had chosen more thoroughly, I realized it called for ground pork livers. Oops. Well, break out my trusty food processor!

Uh, gross. I can only describe this as "liver slurry." I was fairly disgusted.

Stirring in the cream. No, this recipe is NOT healthy. What on earth gave you that idea?

After dealing with the red mush of purƩed liver and cream, I had to console myself with a hearty adult beverage, in this case, Dark Horse Brewing's "Tres" Blueberry Stout. It calmed my nerves.

SautƩeing onions and herbs: something I've done scores of times. This, I can handle.

All mixed together and ready to go. It doesn't look quite as nasty now.

Pâté on display: the finished product.

La table franƧais.

A few of the MLFB gang.

I confess I did not get my pâté recipe from "MTAOFC" (as we started referring to it). I was too lazy to procure a copy from my library so I just looked up a recipe online.

Ingredients
  • 1 1/2 pounds ground pork liver
  • 1/2 cup heavy cream
  • 1 cup finely chopped onions
  • 1 tablespoon butter
  • 2 cloves garlic, crushed
  • 2 tablespoons chopped fresh parsley leaves
  • 1 tablespoon dried thyme
  • 1 teaspoon dried basil
  • 1 1/2 pounds ground pork
  • 2 eggs
  • 1 tablespoon salt
  • 1 teaspoon freshly ground black pepper
  • 1 tablespoon flour
  • 1/3 cup brandy
  • 3 bay leaves
Put the pork liver in a bowl. Add the cream and let stand for one hour. Preheat the oven to 350° F. SautĆ© the onions in the butter over medium heat for about five minutes, or until they are very soft. Add the garlic, parsley, thyme and basil and mix well. Remove from the heat. Place the ground pork in a mixing bowl. Add the vegetable mixture, ground liver and cream mixture, eggs, salt, pepper, flour and brandy. Mix well. Spoon the meat mixture into a loaf pan and top with the bay leaves. Cover tightly with aluminum foil. Place the loaf pan in a larger pan that has been filled halfway with hot water. Bake for 1-1/2 hours. Carefully drain off excess fat. Cool. Cover again tightly with aluminum foil and weight it down on top with two or three canned goods. Refrigerate for at least eight hours. Remove the bay leaves. Serve with toast points or crackers.

Monday, February 23, 2009

Clearly, I Can't Multitask

This morning before I left for work I put half a pound of Rancho Gordo Runner Cannelini beans into some water to soak all day because I am going to use them for dinner tonight (Chicken with White Beans and Rosemary).

I just remembered that I forgot to pull the chicken thighs (you know, the "chicken" part of this meal) out of the freezer to defrost.

It's Monday; what can I say?

Wednesday, February 4, 2009

Summer in January

The spread

On January 24 the lovely ladies of the MLFB descended on my house for a late-afternoon get-together that was intended to transport us back to those warm and luxurious days of summer. If it had to be winter outside, then it could also be summer inside, if only for a few hours.

I can't emphasize enough how fortunate I feel to be part of this group of women. You guys (gals?) rule!

This is what happens when you spend the first part of the afternoon listening to opera and get home 45 minutes before the party starts: total biscuit chaos.

Patti, Diana, and Jen (Zora on the couch)

Zora, Cathy, Kim, and Alex (I apologize for the big fingerprint smudge)

Cindy (aka MK) and Alex's fabulous mojitos in the foreground (oh, so divine!)

Maggie's miniature cones and berry sorbet...yum!

Patti's blackberry pudding made with frozen blackberries from Locavorious

The way it should be: an empty glass at the end of the day

Monday, January 12, 2009

Indoor Picnic: Pulled Pork Sandwiches, Oven Fries, and Homemade Ketchup

In a couple of weeks the Michigan Lady Food Bloggers will be descending on my house for a "sweep away the winter blahs" event, the theme of which is "Summer in January." I decided to take the concept for a test drive, inspired by a recipe for homemade ketchup that was in my most recent issue of Saveur. From there, it was a natural branching-out to pulled pork made with one of the last two remaining pieces of our Back Forty Acres hog and oven fries done right from the fine folks of Cook's Illustrated (aka America's Test Kitchen). Put everything on a red-and-white checkered tablecloth and I had myself an indoor summer picnic.


But first, the ketchup (Saveur Magazine, Jan/Feb 2009, p. 52).

Ingredients:
  • 4 whole cloves
  • 1 bay leaf
  • 1 cinnamon stick
  • 1/4 tsp celery seeds
  • 1/4 tsp chile flakes
  • 1/4 tsp whole allspice (about 6-7 pieces)
  • 2 lbs tomatoes, roughly chopped
  • 1 1/2 tsp kosher salt
  • 1/2 cup white vinegar
  • 5 tbsp brown sugar
  • 1 onion, chopped
  • 1 anaheim chile, chopped
  • 1 clove garlic
Wrap cloves, bay leaf, cinnamon, celery seeds, chile flakes, and allspice in a layer of cheesecloth; tie into a bundle and put into a 4-quart saucepan over medium-high heat along with tomatoes, salt, vinegar, brown sugar, onion, and anaheim chiles; smash and add the garlic. Cook, stirring occasionally, until onions and chiles are very soft, 40 minutes. Remove spice bundle; pureƩ sauce in a blender until smooth. Strain sauce through a mesh strainer into a 4-quart saucepan over medium heat. Cook, stirring occasionally, until thickened, 30 minutes. Add more salt, sugar, or vinegar, if you like. Transfer ketcup to a glass container. Set aside to cool. Cover with a tight-fitting lid and refrigerate for up to 3 weeks.


I didn't have any anaheim chiles; if I had done my homework beforehand I probably could have found them or an adequate substitute but the day I did my shopping for this dinner (Saturday) was such a diaster, weather-wise (you MLFBs know what I'm talking about!) that the prospect of trying to drive anywhere chilled my blood and thus I just clomped through the snow to the New Chelsea Market instead. I am lucky to be able to walk to a well-stocked grocery store. I even grabbed the last bundle of Zingerman's Bakehouse hamburger buns while I was there.

I also boosted the number of tomatoes in the recipe (I think I used closer to 3 pounds) and since the recipe only said "onion" I chopped up three very small onions, assuming that was approximately equal to one large onion. Hey, it didn't seem to affect the recipe at all.

I used my stick blender to puree the mixture directly in the pot (MESSY!) and didn't strain it at all; consequently, my ketchup had chunks and seeds in it. What can I say, I was lazy. And no one seemed to care.

That's some fine-looking condiment.

Oh, half hog, we hardly knew ye.

Next, the pulled pork (Weber's Big Book of Grilling, p. 169):
  • 1 boneless pork shoulder roast (also known as Boston butt), 4 to 5 pounds
  • Kosher salt
  • Freshly ground black pepper
Allow the roast to stand at room temperature for 20-30 minutes before grilling. Season with salt and pepper. Grill the roast, fat side up, over indirect medium heat until the internal temperature reaches between 185 and 190 degrees F, 3 to 4 hours. The meat should be so tender it pulls apart easily. Remove from grill, place on platter, and loosely cover with foil. Allow to rest for about 20 minutes.

For the barbeque sauce:
  • 3 tbsp unsalted butter
  • 1/4 cup minced yellow onion
  • 2 cups ketchup
  • 2/3 cup packed light brown sugar
  • 1/2 cup yellow mustard
  • 1/2 cup cider vinegar
  • 2 tsp Worcestershire sauce
  • 1 tsp Tabasco sauce
In a small saucepan over medium-high heat, melt the butter and cook the onion, stirring occasionally, until translucent, 4-5 minutes. Add the rest of the sauce ingredients and bring to a boil. Reduce heat and simmer for 10 minutes. Set aside and allow to cool to room temperature.

Once the roast has finished resting, thinly slice, chop, or "pull" the pork meat into shreds with your finger or two forks, discarding any large bits of fat. Moisten the meat with some of the sauce and mix well in a bowl. Toast hamburger buns, if desired. Serve the pulled pork warm on the buns with the remaining sauce on the side.

Of course I used my freshly-made ketchup in the sauce recipe!


And last, but not least, the oven fries (Cook's Illustrated, Jan/Feb 2004, p.21):
  • 3 russet potatoes (about 8 ounce each), peeled and cut lengthwise into 10-12 evenly sized wedges
  • 5 tbsp vegetable or peanut oil
  • Kosher salt and freshly ground black pepper
Adjust oven rack to lowest position; heat oven to 475 degrees F. Place potatoes in large bowl and cover with the hottest tap water you can get; soak for 10 minutes. Meanwhile, coat an 18 x 12-inch heavy-duty rimmed baking sheet with 4 tbsp oil and sprinkle evenly with 3/4 tsp salt and 1/4 tsp pepper; set aside.

Drain potatoes. Spread potatoes out on triple layer of paper towels and thoroughly pat dry with additional paper towels. Rinse and wipe out now-empty bowl; return potatoes to bowl and toss with remaining 1 tbsp oil. Arrange potatoes in a single layer on baking sheet; cover tightly with foil and bake for 5 minutes. Remove foil and continue to bake until bottoms of potatoes are spotty golden brown, 15-20 minutes, rotating sheet after 10 minutes. Using spatula and tongs, loosen potatoes from pan, then flip each wedge, keeping potatoes in single layer. Continue baking until fries are golden and crisp, 5 to 15 minutes longer, rotating pan as needed if fries are browning unevenly. Transfer fries to second baking sheet lined with paper towels to drain. Season with additional salt and pepper and serve.

Just pretend it's 81 degrees outside instead of 18, OK?

Wednesday, December 17, 2008

Holiday Treats Exchange

Buddy thinks: "If they just look away for a second...all of this could be mine!"

On Saturday I met up with the lovely Michigan Lady Food Bloggers at Patti's house for a cookie exchange. Well, not really a cookie exchange, but an all-out treats extravaganza. A cookietravaganza? Either way, it was good eats, good treats, and good conversation. I brought three varieties of cookie to the gathering: espresso biscuits, pecan snowdrops, and molasses spice cookies. I came home with my biggest plastic container bursting with about a dozen different kinds of treats. It was another fine evening of merriment. Even the foul weather could not dampen the mood.


The madness begins!


My haul

The aftermath

Molasses Spice Cookies


This was another offering for the MLFB gathering. This is one of my Old Standbys. I make these cookies all the time. This recipe is from Cook's Illustrated New Best Recipe.

Ingredients:
  • 2 1/4 cups (11 1/4 ounces) all-purpose flour
  • 1 tsp baking soda
  • 1 1/2 tsp ground cinnamon
  • 1 1/2 tsp ground ginger
  • 1/2 tsp ground cloves
  • 1/4 tsp ground allspice
  • 1/4 tsp salt
  • 1 1/2 sticks (12 tbsp) unsalted butter, softened but still cool
  • 1/3 cup ( 2 1/3 ounces) packed dark brown sugar
  • 1/3 cup (2 1/3 ounces) granulated sugar
  • 1 large egg yolk
  • 1 tsp vanilla extract
  • 1/2 cup light or dark molasses
Adjust an oven rack to the middle position and heat the oven to 375 degrees. Line a large baking sheet with parchment paper or spray it with nonstick cooking spray (I used my Silpat silicone baking mats, which EVERYONE SHOULD HAVE BECAUSE THEY RULE).

Whisk the flour, baking soda, spices, and salt in a medium bowl until thoroughly combined; set aside.

Either by hand or with an electric mixer, beat the butter and sugars at medium-high speed until light and fluffy, about 3 minutes. Reduce the speed to medium-low and add the egg yolk and vanilla; increase speed to medium and beat until combined, about 20 seconds. Reduce the speed to medium-low and add the molasses; beat until fully incorporated, scraping the bowl with a spatula once. Reduce the speed to the lowest setting; add the flour mixture and beat until just combined, about 30 seconds, scraping the bowl once. Give the dough a final stir by hand to ensure there are no pockets of flour at the bottom. The dough will be soft and gooey.

Place some more granulated sugar in a small bowl for rolling. Pinch off wads of dough (approximately 1 heaping tablespoon) and roll into balls about 1 1/2 inches across. Roll the dough in the sugar to coat and place each ball on the prepared baking sheet, spacing them about 2 inches apart.

Bake until the cookies are browned and still puffy, the edges have begun to set, and the centers are still soft (the cookies will look raw between the cracks and seem undone), about 11 minutes, rotating the sheet from front to back halfway through the baking time. Do not overbake.

Cool the cookies on the baking sheer for 5 minutes before transferring to a rack. Makes about 20-24 cookies depending on the generosity of your dough balls.

Sugar and spice and everything nice...wait, no sugar in this picture, just spice!

I did not have enough molasses (probably barely 1/4 cup) so my dough was not as dark and gooey as it should have been.